Connect the CG 6565 board in loopback mode to test the digital trunk application without connecting to the telephone network.
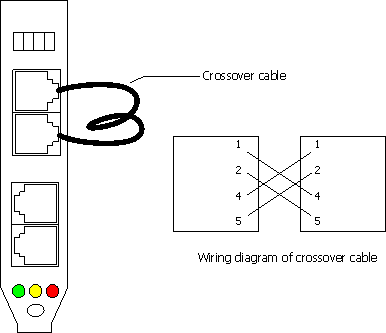
The following illustration shows the loopback configuration connecting trunk 0 and trunk 1 with a crossover cable on a CG 6565 board with four trunks:
The crossover cable connects the transmit signals from one trunk to the receive signals on another trunk as shown.
If your board configuration uses two optional splitter cables to use trunks 2 and 3, you can connect the splitter cables in loopback mode. Use the crossover cable to connect the transmit signals on one of the splitter cables to receive signals on the second splitter cable.
Use a signal entry panel (SEP) or a punchdown block with eight RJ-48C trunk interfaces to test the eight-trunk variant of the CG 6565 board.
Connect a crossover cable for each transition board trunk interface to set up the loopback configuration. Use a shielded 50-pin Telco cable to connect the CG 6565 to the signal entry panel or punchdown block.
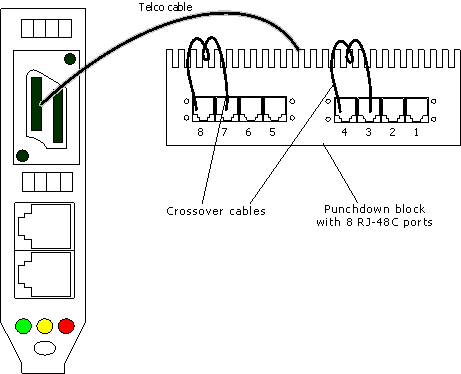
The crossover cable connects the transmit signals from one trunk to the receive signals on another. The following illustration shows the CG 6565 loopback configuration with a punchdown block connecting trunks 7 and 8, and trunks 3 and 4 using crossover cables:
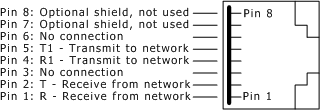
Each of the RJ-48C trunk interfaces has the pinouts shown in the following illustration: