PowerMedia XMS comes with RESTful Client Verification Demo. This Verification Demo is a Java application that can be run from a system with a Java Runtime Environment (JRE). The usual choice would be the system used for the Console via a web browser.
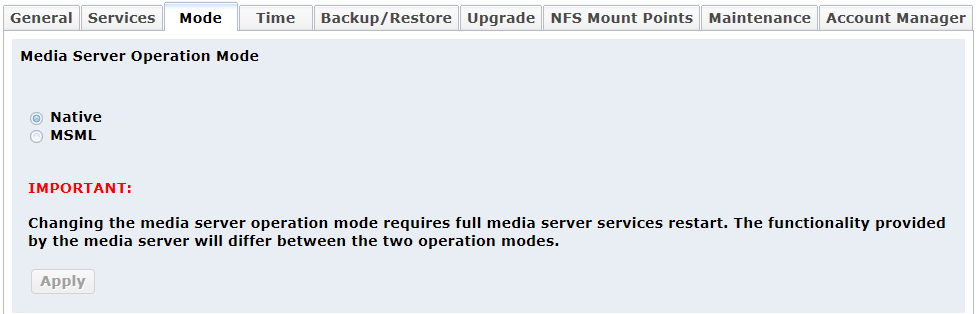
The PowerMedia XMS first comes up in MSML mode. This mode allows it to use MSML for application control. For the Verification Demo, the PowerMedia XMS must run in Native mode, where application control can be done via a Java-based RESTful application.
Switching to Native mode is accomplished in the System > Mode page from the Console. Click the Native radio button and then click Apply.
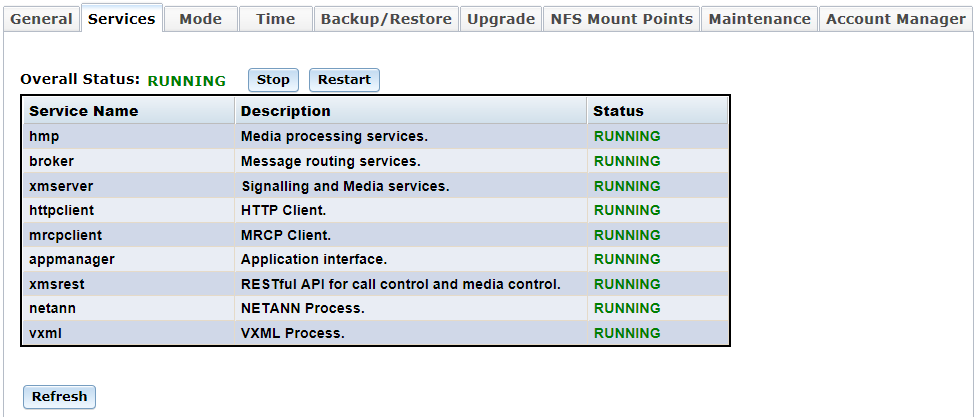
Once Native mode has been selected, services are automatically stopped and then restarted. Verify this by viewing the System > Services page from the Console.
The Verification Demo is available through the Console’s Downloads page. Before running the demo, you must set up a SIP softphone to receive calls. For more information, see Verification Using a SIP Softphone. Be sure to have a SIP softphone ready before running the demo.
Note: The Verification Demo is audio only.
To run the demo, follow these steps:
From the Console, click Downloads > Tools page.
Select the XMS Verification Demo.
Save the XMSVerificationDemo directory to your local location from the pop up window. The demo file is a .zip file.
Unzip the file.
Navigate to the /dist directory.
Double-click on the XMSVerificationDemo.jar file to open the demo (Windows) or run the demo directly from Java "java –jar XMSVerificationDemo.jar" (Windows or Linux).
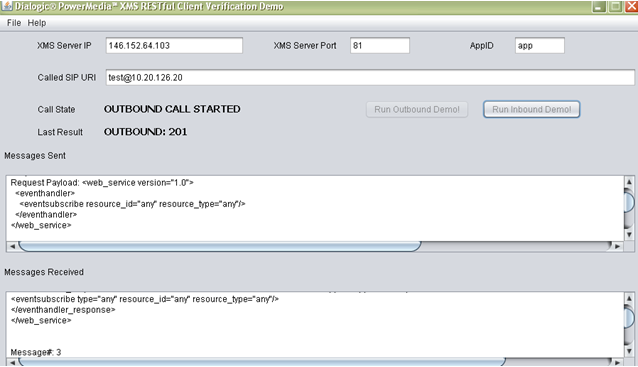
The Demo’s main screen will appear. It includes a Call State to show progress. All messages sent and received will appear in their respective boxes.
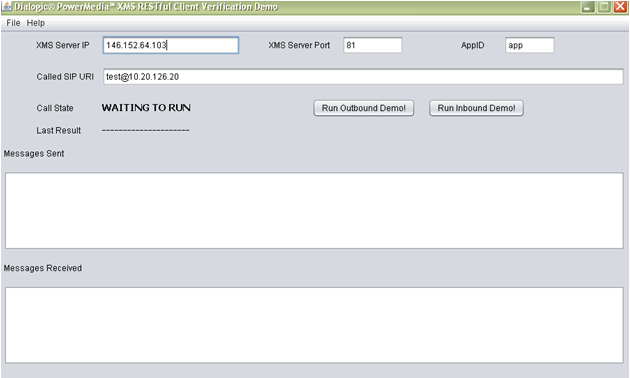
The demo can be run in either an Inbound mode where the PowerMedia XMS will expect a call from a SIP softphone, or in an Outbound mode where it will place a call to a SIP softphone.
Run the Inbound demo as follows:
Indicate the name of the PowerMedia XMS IP address in the space provided.
Click Run Inbound Demo. The Call State should change to WAITING FOR CALL.
Place a call from your SIP softphone to the PowerMedia XMS IP address.
Run the Outbound demo as follows:
Indicate the name of your PowerMedia XMS IP address in the space provided.
Set the Called SIP URI to your SIP softphone’s URI.
Click Run Outbound Demo. The Call State should change to OUTBOUND CALL STARTED.
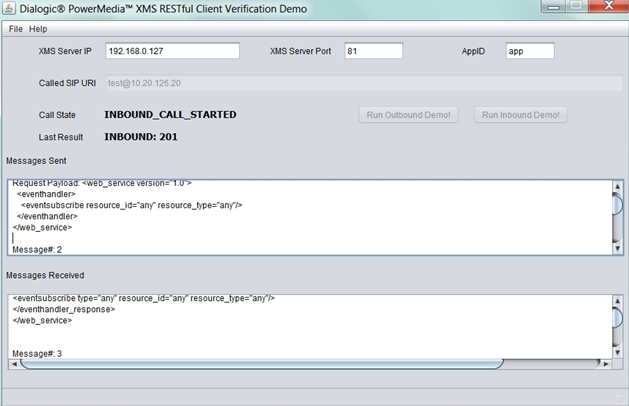
In either the inbound or outbound case, a greeting should be seen and heard. The demo’s progress can be determined by viewing the Call State and Last Result status. Sent and received messages also provide the call status as shown in the following sample screen:
The demo leads the caller through several menus, and allows several multimedia clips to be played, or a multimedia recording to be made and replayed. If the verification demo is not successful, an error will appear on the screen and messages will be captured in the verification.log file. This log file is located in the /dist directory from where the .jar file was executed.